Loop & Switch
Loops in programming execute a set of instructions repeatedly until a specific condition is met, streamlining repetitive tasks within the code. Imagine you have a task that needs to be done multiple times with slight variations or a list of items you need to process—this is where loops shine. Loops are incredibly beneficial in programming for several reasons like efficiency, scalability, flexibility.
The for loop in JavaScript is like a built-in handy tool for doing things repeatedly for a specific number of times. Its structure follows this pattern:
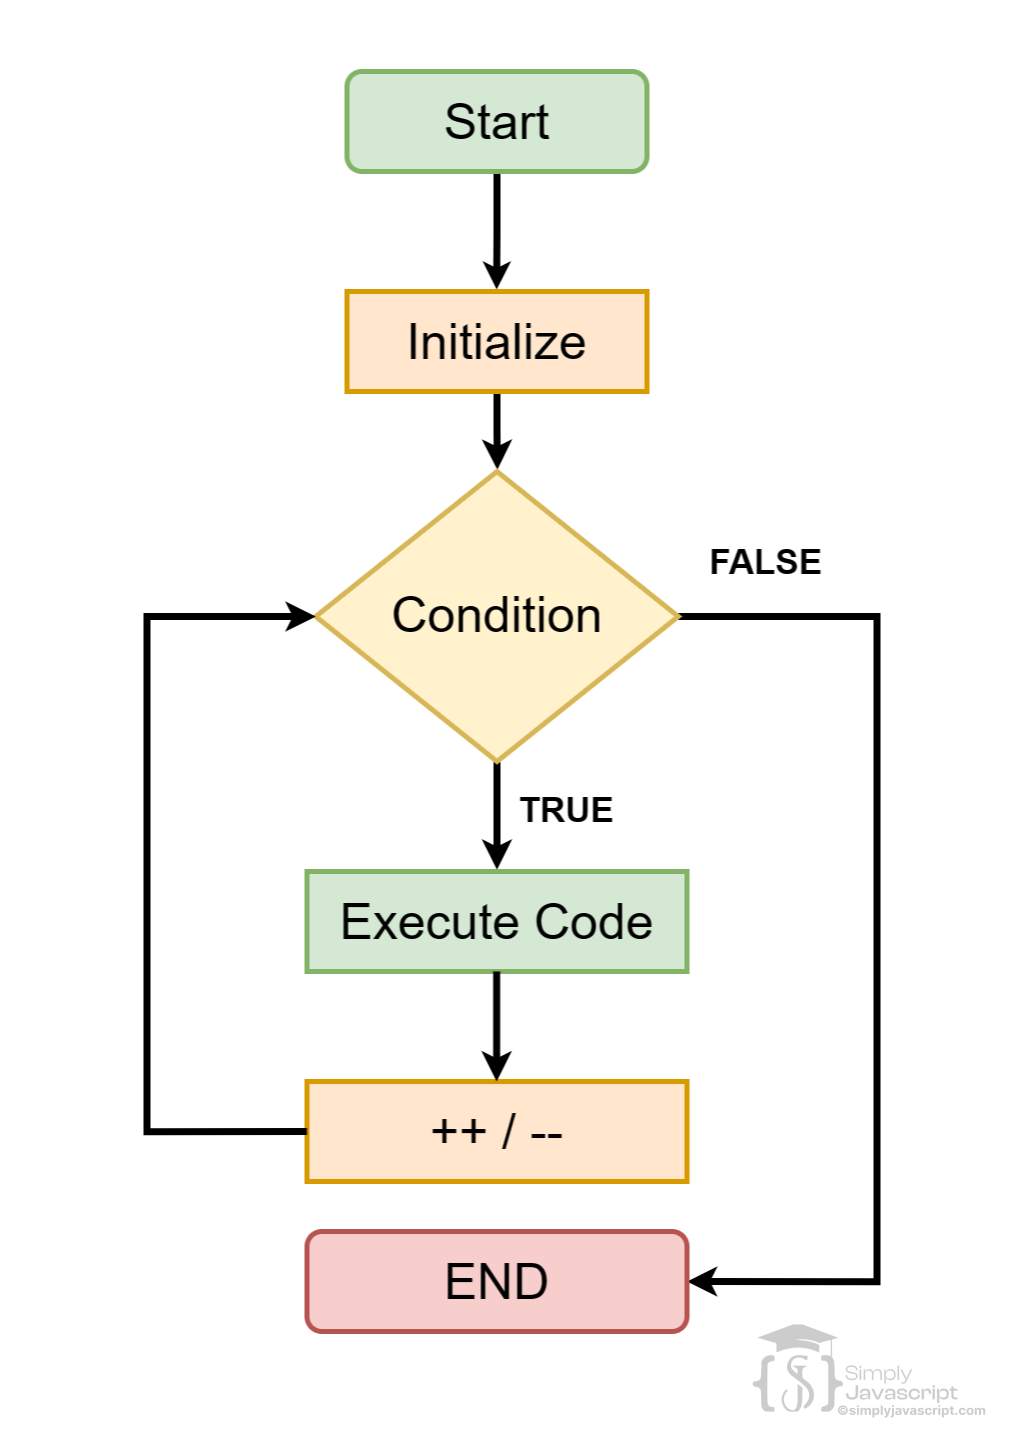
for (initialization; condition; increment/decrement) {
  // code to be executed
}
Here's a breakdown of how it works:
- Initialization: It kicks things off by setting up, usually initializing a counter variable. This part happens once at the beginning of the loop.
- Condition: On each run through the loop, this condition gets checked. If it's true, the code block inside the loop runs. If false, the loop stops.
- Increment/Decrement: After each loop iteration, this step happens. It's often used to update the counter variable, shifting it closer to the condition being false.
for (var i = 0; i < 10; i++) {
  console.log(i);
} The for...of loop in JavaScript is a nifty tool for going through items within arrays, strings, or any other iterable objects. It has a simple and clean structure:
//Syntax
for (variable of iterable) {
  // code to be executed
}

//Example:
let array = [1, 2, 3, 4, 5];
for (const item of array) {
  console.log(item);
} - variable: It represents the current item in the iteration. You assign this variable to hold the value of each item in the iterable as you loop through.
- iterable: This refers to the array, string, or any iterable object you want to loop through.
The for...of loop in JavaScript is a nifty tool for going through items within arrays, strings, or any other iterable objects. It has a simple and clean structure:
//Syntax
for (variable of iterable) {
  // code to be executed
}

//Example:
let array = [1, 2, 3, 4, 5];
for (const item of array) {
  console.log(item);
} - variable: It represents the current item in the iteration. You assign this variable to hold the value of each item in the iterable as you loop through.
- iterable: This refers to the array, string, or any iterable object you want to loop through.
A while loop in JavaScript is a control flow statement that allows you to repeatedly execute a block of code as long as a specified condition is true. The basic syntax of a while loop is as follows:
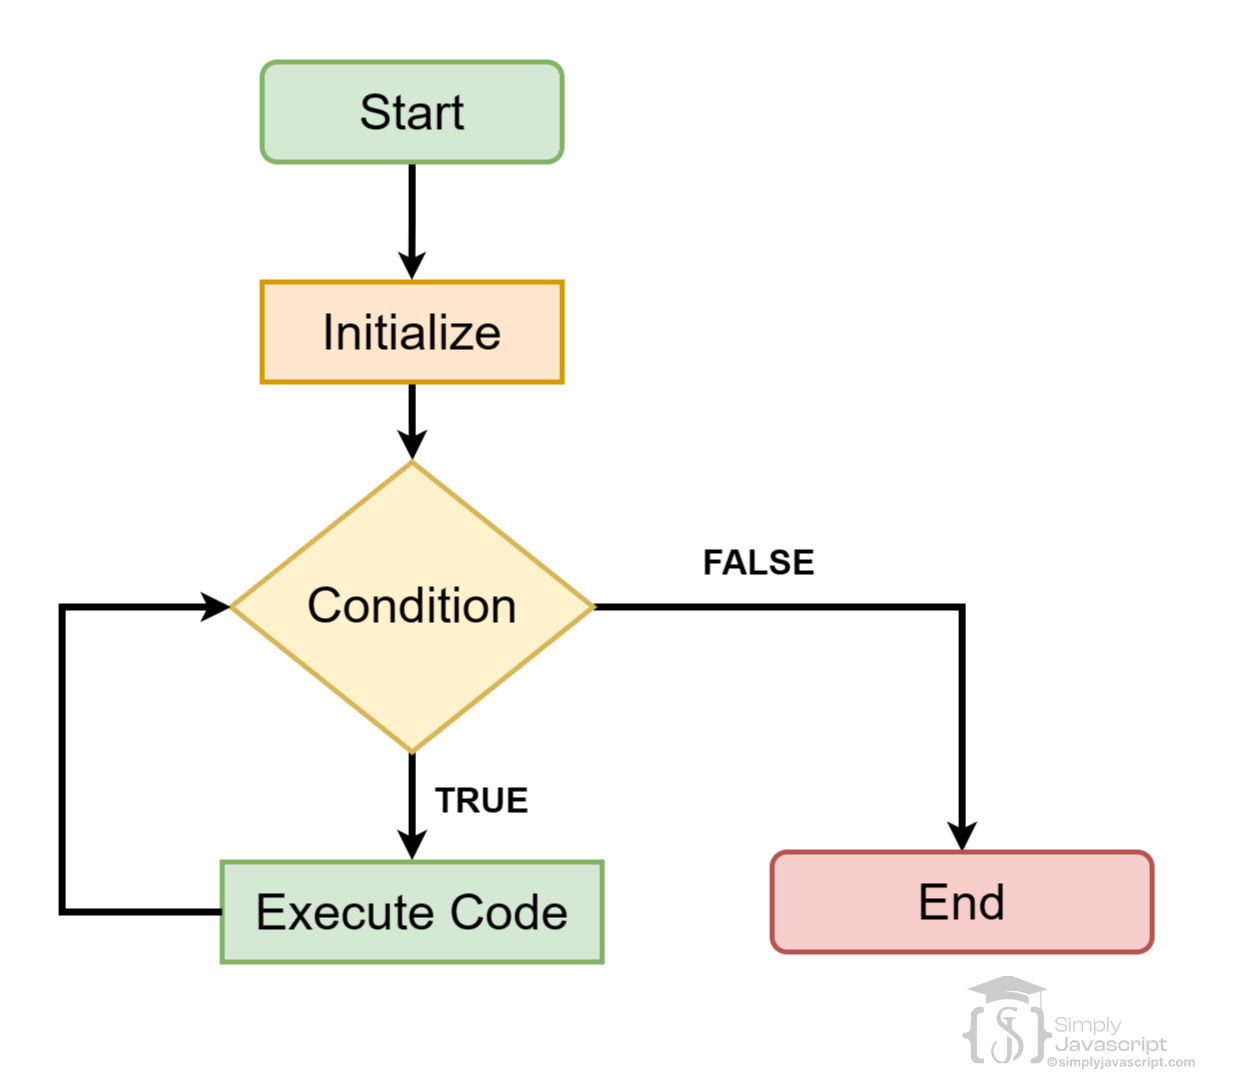
//Syntax
while (condition) {
  // code to be executed
}

//Example:
let i = 0;
while (i < 10) {
  console.log(i);
  i++;
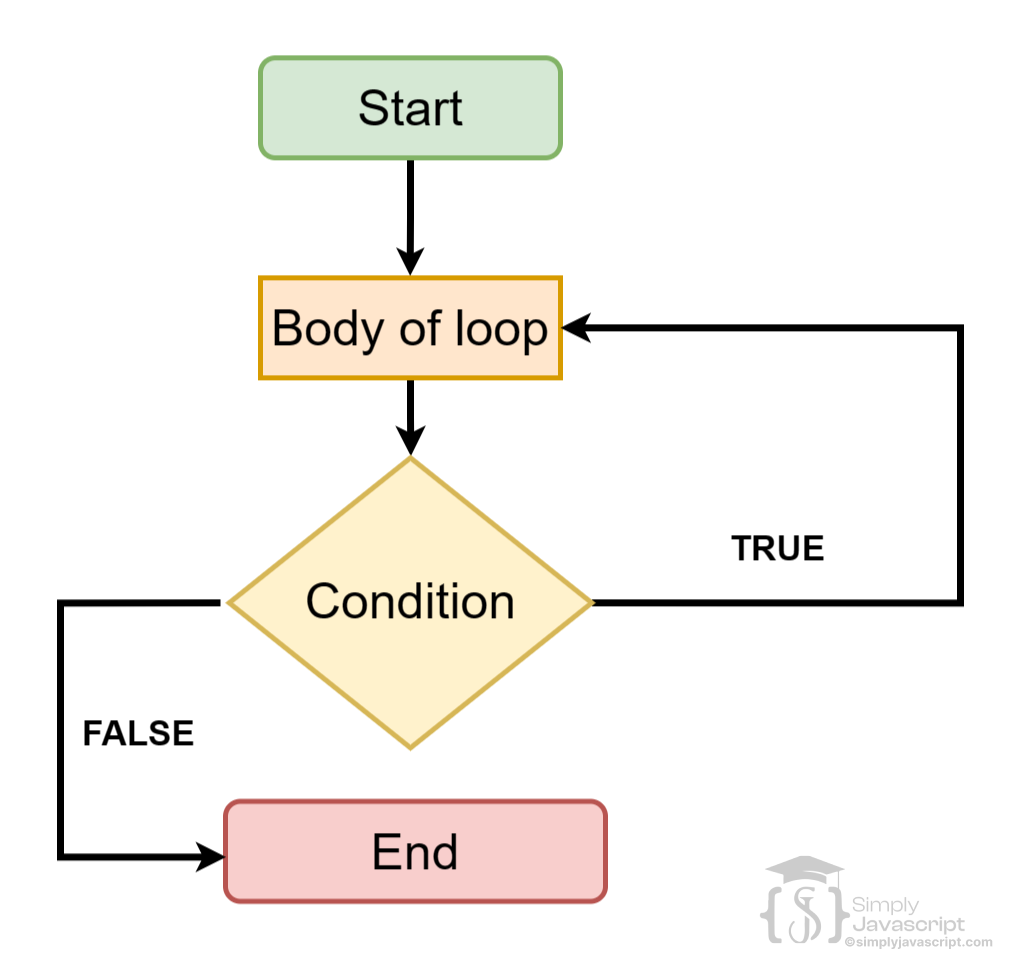
} The do...while loop in JavaScript is a lot like the while loop, but with a twist—it ensures that the code inside the loop runs at least once, even if the condition initially evaluates to false. Here's how it's structured:
//Syntax
do {
  // code to be executed
} while (condition);

//Example
let i = 0;
do {
  console.log(i);
  i++;
} while (i < 10);
The block of code inside the do runs first, unconditionally, before the condition is even checked. After the code runs for the first time, the while condition is evaluated.
A nested loop in programming is when you have one loop inside another loop. This means that inside the body of the outer loop, there's another loop running. Each time the outer loop runs, the inner loop runs completely. The inner loop's entire cycle happens for every single iteration of the outer loop. This allows for a structured way to perform repetitive tasks, like going through a set of items and then, for each item, going through another set of items.
for (let row = 1; row <= numRows; row++) {
  // Draw a row (outer loop)
  for (let column = 1; column <= numColumns; column++) {
    // Draw a square in the row (inner loop)
    // Draw the square at the current row and column
  }
} A switch statement in JavaScript is a control flow statement that allows you to test a variable or expression against multiple cases, and execute different code for each case that matches. The basic syntax of a switch statement is as follows:

switch (expression) {
  case value1:
    // code to be executed if expression === value1
    break;
  case value2:
    // code to be executed if expression === value2
    break;
  ...
  default:
    // code to be executed if expression does not match any of the cases
}
Here is an example of a switch statement that checks the value of a variable called day and outputs a message depending on the day:
let day = "Monday";
switch (day) {
  case "Monday":
    console.log("Today is Monday.");
    break;
  case "Tuesday":
    console.log("Today is Tuesday.");
    break;
  case "Wednesday":
    console.log("Today is Wednesday.");
    break;
  case "Thursday":
    console.log("Today is Thursday.");
    break;
  case "Friday":
    console.log("Today is Friday.");
    break;
  default:
    console.log("Today is a weekend day.");
}
In this example, if the value of day is "Monday", the output will be "Today is Monday.". It is important to include the break statement after each case block to prevent the code from falling through to the next case. Also, it's important to include a default case block to handle cases where the expression does not match any of the cases.
While the switch statement is handy for multiple comparisons, especially when you're dealing with discrete values, it might not be the best choice for all scenarios—like when you need to compare against ranges of values or use non-primitive types as cases. Additionally, it's a good practice to have a default case to handle unexpected or unmatched situations.
In JavaScript, the break statement is used to break out of a loop or a switch statement. When the break statement is encountered within a loop or switch statement, it immediately exits the current iteration or case block, and the flow of control jumps to the next statement following the loop or switch.
let grade = 'B';
switch (grade) {
  case 'A':
    console.log("Excellent");
    break;
  case 'B':
    console.log("Good");
    break;
  default:
    console.log("Invalid grade");
}

for (let i = 0; i < 10; i++) {
    if (i === 5) {
        break; // Exit the loop when i is 5
    }
    console.log(i); // Output: 0, 1, 2, 3, 4
}
console.log('Loop has been exited.');
The for loop iterates from 0 to 9, but the break statement exits the loop when i is 5, so it only prints numbers 0 through 4.
- What is a loop and what's the use of it in programming?
- Explain for loop.
- Explain the for..of loop in JavaScript. How does it differ from the traditional for loop, and what kind of collections can it iterate through?
- Explain the for..in loop in JavaScript. What does it iterate over, and how is it commonly used in object iteration?
- Explain while loop.
- Explain the difference between for loop and while loop.
- Explain the do...while loop.
- Explain nested loops.
- Explain switch statement.
- Explain the break and continue keywords.
- Explain the significance of the default case within a switch statement.
- Explain the case sensitivity of the switch statement.
- Explain the precautions or considerations to keep in mind when using "falling through" cases in a switch statement. How can this behavior impact the flow of code execution?
-
Write a nested loop to generate a square pattern of
asterisks (*) with a given side length. For example,
if the side length is 5, the pattern would be:
***** ***** ***** ***** ***** -
Create a nested loop to print a right triangle
pattern using asterisks (*). For instance, if the
height is 5, the pattern should look like:
* ** *** **** ***** -
Write a nested loop to generate an inverted right
triangle pattern using asterisks (*). If the height
is 5, the pattern would be:
***** **** *** ** * -
Create a nested loop to print a hollow rectangle
pattern with asterisks (*). For example, for a
rectangle of width 6 and height 4, the pattern would
be:
****** * * * * ****** -
Generate a nested loop to print a number pyramid.
For instance, for a height of 5, the pattern would
be:
1 121 12321 1234321 123454321 -
Create a nested loop to generate a diamond pattern
with asterisks (*). For instance, for a height of 5,
the pattern would be:
    *
   ***
  *****
 *******
*********
 *******
  *****
   ***
    *
